Set-up instructions
Data transfer to the PHR
You will now be automatically directed to the installation of the Sensotrend Uploader.
Select the devices you are using (1) and then press the “OK” button (2). You can search for devices with the “Search” functionality (3).

The details of the next screen depend on the device selections you make.
Press the “Download Sensotrend Uploader!” button (1). The “Sensotrend Uploader” page will then open, with a green upload button for the application version that is most likely to work for you. Now press the download button (2).

Next, you will be prompted to install the Sensotrend Uploader.

The installer will download to your computer.
The installation depends a bit on your operating system. This guide follows the Windows operating system.Follow these instructions to start the Sensotrend Uploader installation.
When the download is complete, the downloaded file is usually found in the lower left corner of your browser. Run it with the “Open” functionality (1).

Follow the instructions in the installer to install the Sensotrend Uploader.
The application uses Tidepool drivers, which are installed during installation. Therefore, the messages below will be displayed during installation.

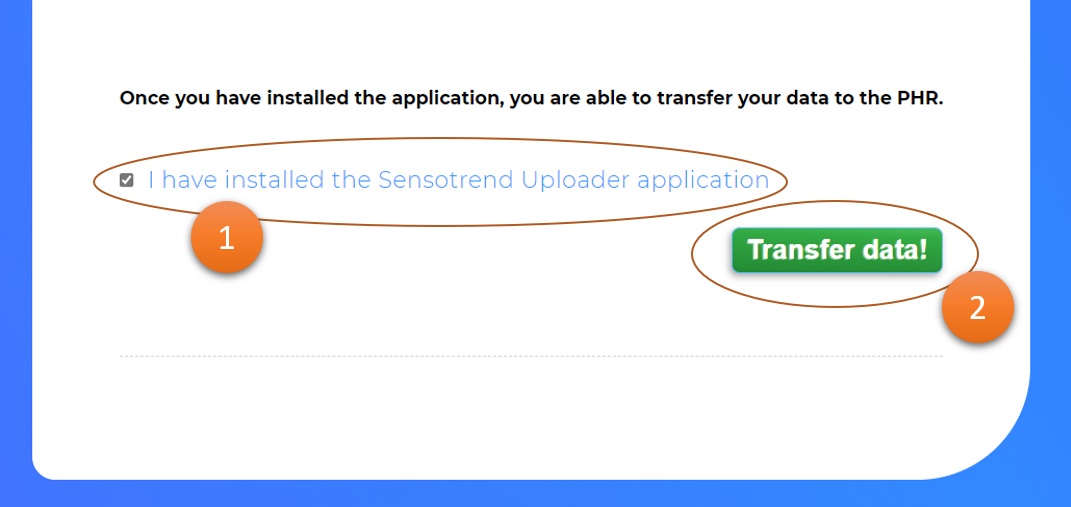
The end of the page where you were asked to install the Sensotrend Uploader looks like this.
Check the “I have installed the Sensotrend Uploader” box (1) and continue with the “Transfer data!” button (2).
Next you will see a page like this.

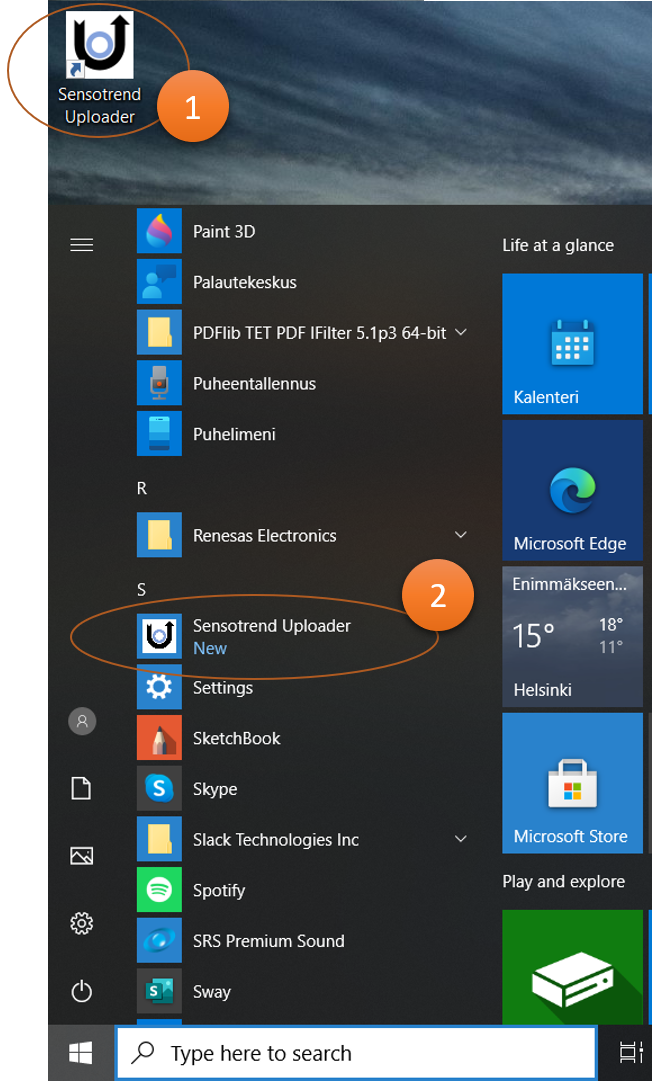
Now launch the Sensotrend Uploader you just installed.
Depending on the installation you have performed, the application can be found, for example, on the Desktop (1) or in the application list (2).
The application will ask for your email address and password (1).
Enter the same email address and password you entered earlier , then press the “Log in” button (2).
The first time you use Sensotrend Uploader, you will be asked to select the devices you are using.
Select the devices you are using from the list (1) and then press the “Done” button (2).
You are now ready to transfer the data stored on your devices to the Kanta PHR!
Device-specific instructions for tranferring device data to the Kanta PHR
- Abbott FreeStyle Libre
- Abbott FreeStyle Lite or Freedom Lite
- Abbott FreeStyle Precision/Optium Neo
- Abbott Precision Xtra
- Animas
- Ascensia (Bayer) Contour Next
- Ascensia (Bayer) Contour Next EZ, Contour, Contour Link or Contour Plus
- CareSens N Premier or Dual
- CareSens N Premier or Dual (Using Bluetooth)
- Dexcom
- Insulet OmniPod
- Insulet OmniPod DASH
- Medtronic 523, 723, Veo or 530G (Using Contour Next Link)
- Medtronic 630G, 640G, 670G (Using Contour Next Link 2.4)
- OneTouch Verio, Verio Flex or Verio Reflect
- OneTouch VerioIQ
- OneTouch UltraMini
- OneTouch Ultra 2
- ReliOn Premier (BLU, Voice or Classic)
- Roche Accu-Chek Aviva Connect, Guide or Guide Me
- Tandem
- Trividia Health True Metrix or True Metrix Air
- Trividia Health True Metrix Go
You have now transferred the data from your devices to the Kanta PHR.
Next, check the “I have transferred data to PHR” box (1) and continue with “Proceed!” button (2).

Your information is now in the PHR and you can start viewing it.